Visually depicting the colour of your event is so important for effective marketing, but professional photography is one of the line items organisers are least likely to spend out for.
When we conducted our 2016 Pulse Report, we found that nearly 40% of all event organisers spend nothing at all on video and photography. Charities in particular just don’t have any budget for ‘extras’ such as this.
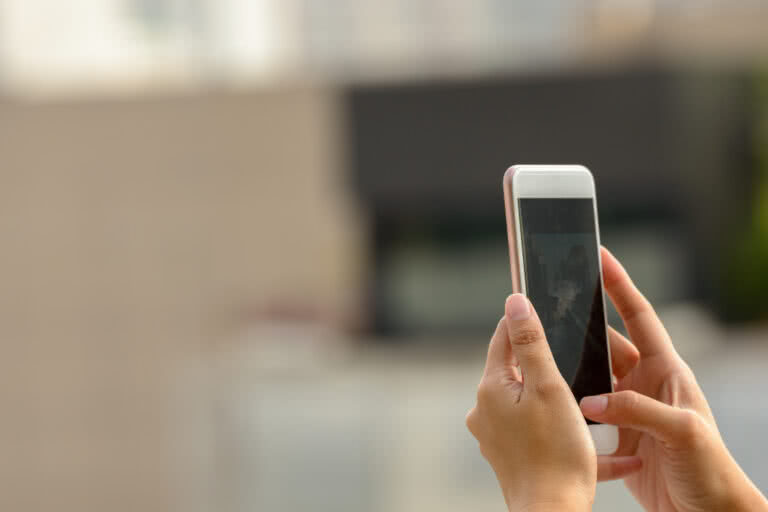
However, just because you can’t afford David Bailey doesn’t mean you can’t capture some wonderful images of your event – thanks to the latest technology, anyone with a smartphone can snap pro-looking pics.
Read on to discover the must-have apps and tools, as well as some top tips for getting the best results.
Related: The importance of photography to a brand experience
Photography basics
Focus – Lack of focus in the reason most smartphone photos fail. While light and contrast can be improved in post-production, you can’t fix a blurry photo. Simply tapping on the phone screen will focus your camera. By default it will focus in the centre, but if you want to focus on something off centre or in the foreground, you’ll need to let it know. Just tap the screen where you want the focus to be and a yellow box will appear. You’ll notice also that your phone automatically adjusts exposure in response, enabling you to get a clear, sharp shot. Be sure not to change distance from your subject once focus is set.
Zoom – Unless you have a tele lens accessory for your phone (see kit section below) don’t zoom in as doing so can make the photo appear grainy, blurry, or pixelated. Instead, move closer to your subject and preserve the image resolution. If you can’t get close enough, take the photo without zoom and crop in afterwards.
Flash – Smartphones’ in-built flashes are notoriously poor, often resulting in ghoulish red eyes and shiny, sallow skin for your subjects. This being the case, avoid the flash and try to use natural light sources. Move closer to a window or into a brighter lit space. If you have an external light source, such as a lamp you can play around with positioning this. You can drastically improve low-light shots by keeping the phone totally still. Place it on a stable fixed object or use a tripod to prevent blurring as a result of the slower shutter speed. If the shot is sharp you can always play with exposure in post-production to lighten it up.
Perspective – Most of us just point and shoot, holding the camera at eye-level, but you can make your photo instantly more interesting by taking it from a different angle. Crouch down low and shoot upwards or stand on something and shoot down. By approaching framing with a little creativity you can present viewers with a striking alternative perspective.
Composition – To help you achieve an aesthetically pleasing composition switch on the gridlines in your phone’s settings. This will divide your screen into nine equal segments and enable you to accurately apply the rule of thirds. According to this photographic composition principle, you should place points of interest (such as the horizon) along the lines or at an intersection between horizontal and vertical lines. This should make your image more balanced.
Pro tip – Static or staged images can be boring, inject life by snapping the action candidly or having your subjects wave or jump. Use your camera’s ‘burst’ function to take multiple images at a time and then pick the best.
Related: 10 Places to get free images for your event marketing
Event photography tips
Here are some tips on how to impress with your event photography:
1. Prepare well
Before you arrive at the event write down or have a shot list so you know what to capture and when. If you can, visit the event venue first to recce the lighting, floor plan and access points. Check your camera over and ensure it has enough battery and memory for the event duration. Decide which mode to shoot in and how you will transfer images.
2. Arrive early
Arrive early at the event and make friends with the door staff and event managers, these are the people who may grant you access later or will be able to advise you on where you need to be. Check the policy on photography and if there are any areas or people you are prohibited to shoot. Review the area and use this time to take great early shots of the venue empty, or of people setting up.
3. Capture a mixture of photos
Many events only commission the obvious crowd shots, or polished shots of VIPs shaking hands. Think about interesting photos you can take that will stand out. These might be candid moments of laughter or photos taken from a different view point (many exhibition halls have balconies you can access).
Some of the regular shots you will be asked to capture from an event may include:
- Photos of the event looking busy, showing high visitor numbers
- Photos of presenters or speakers
- Big reveal moments like launches or press conferences
- Candid shots within the crowd
- Photos that show off branding for a key sponsor
- Ambient time such as networking drinks or after parties
4. Spend time reviewing the photos
Try to organise a midpoint pitstop where you can scan through your photos to see what you’ve captured and what’s missing. Often when you’re in the middle of shooting it can be difficult to remember what you’ve captured and this will ensure you don’t over-photograph the same group of people, while ensuring you have the right mix of shots.
5. Be self-conscious
At any event the idea is for the attendees to have a great time. Getting in the way, shooting speakers from close-up with a wide lens or photographing people enjoying dinner can bring down the ambience and feel intrusive. Be polite, stay low wherever possible and try to take just 1-3 shots of any one area before you move on. It’s also common courtesy to step away while participants are eating, or to use that time to shoot other areas.
Handy kit
Selfie stick – Not just for a snapping fish-lips poses, a selfie stick can be useful for shooting from above and enables you to fit more into your shot. Get one with Bluetooth remote shutter control like this.

Tripod – Keep your phone steady for blur-free photos. This GorillaPod tripod by Joby has wrappable legs that allow you to secure your phone to almost anything.
Lens – Moment manufactures four lens for smartphones, including a macro lens for close ups, fish eye for unique angles, wide angle for fitting more in and 60mm tele lens for enhanced depth of field.

Related: 33 Free images you can use to promote your events
Top 5 photo apps
- Best for better photos – Camera51
Camera51 is not an editing app; it’s designed to help you take better photos in the first place. It automatically identifies people, objects, scenes and lines in the viewfinder and then guides you to the best possible composition.

Camera51
- Best for filters – VSCO
With all sorts of editing functionality, VSCO is a favourite with serious phone photographers, but for the amateur there is a great range of one-tap, pre-set filters. The filters are very subtle so you can tune your photos to look professional and timeless rather than gimmicky.

VSCO
- Best for portraits – Facetune
Facetune lets you give people pictures a studio gloss. You can smooth skin, whiten teeth, banish dark circles, remove blemishes and enhance features such as eyes and lips. You can even blur the background to make your subject stand out more. And there’s no need to be a Photoshop whiz; it’s all possible with a few taps.

Facetune
- Best for special effects – Lenslight
Get creative with your photos by experimenting with a wide variety of lighting effects. Lenslight includes all sorts of effects such as bokeh, lens flares, light leaks, spotlights, rainbow effects, and much more. Multiple effects can be combined and you can even apply the effects to just certain parts of the photo using the masking tool.

Lenslight
- Best for food porn – Foodie
Foodie is an app designed specifically for taking photos of food. It has 24 food filters to make dishes look more appetising, including pre-sets for meats, sushi, cakes, and other cuisines. It also includes a “best angle” feature to help you snap trendy flat lays like you’d see in a gourmet magazine.

Foodie
Related: 6 Tips for making food and drink at your event photo friendly
Event photography quotation overview
Of course some event organisers are willing to invest in a professional photographer who can take charge of the important photography aspect to ensure that every moment is captured. In this case, you will likely need to send in a quotation for the event photography.
Before you put together your event photography quote make sure you ask as many questions as possible and ideally have a consultation call or meeting to find out as much as possible about the event. If you can, you may also want to visit the event venue to determine space, location, lighting and access. For example, a poorly lit exhibition hall is much harder to photography than a well-lit atrium and this may affect how much time, kit and help you need.
Here is some of the information you may need to gather:
- Location of the event and specific photography opportunities (for example: presentations, parties, speaker sessions).
- Date and time, duration of the event and any other activities such as after parties or breakfast seminars.
- Shot list and which moments the organiser wants you to capture
- Turnaround time and means of transferring images
- Post-event production and any editing that will be required
- Budget and payment terms
Event photography quotation samples
Here’s an example of how you may want to structure your event photography quotation:
Company details
Name, address, phone number, email address.
Customer details
Contact name, number and address.
Event photography requirements
Here you may want to list the name of the event, its location and the dates and times you will be onsite to capture photography. Keep this section concise but also ensure the requirements are clear so that there are no crossed wires regarding when and where photography is required later on. You can also use this section to refer to external documents, such as a shot list.
Pricing
You may wish to split this into sections such as:
- Pre-event consultation, site visits or meetings (don’t forget to include travel)
- Event photography (including all days)
- Post-event production (editing, transfer of images, any physical items like USBs or prints)
- Travel (any additional travel costs as well as parking)
- Equipment (any additional equipment costs)
Terms and conditions
Here you should include any conditions of payment, such as deposits or payment terms.
Conclusion
Investing in professional photography for your event is well worth it if you can stretch the budget. If you can’t, you can still capture great promo pics on your phone with a little bit of know-how, practice and a few clever apps to help you cheat! If you are hired to take photographs of an event, prepare well and enjoy the moment – your photos may be used to help promote and sell the event for years to come.