
Get Started with Live-Streaming for Online Events
Just as there are plenty of different ways to record video from the comfort of your home, so too are there plenty of ways to get started with live-streaming.
However, while most of us are comfortable enough using our phones and laptops to communicate over video, finding your way with live-streaming for online events can seem a lot more daunting. In fact, research by EventMB shows that the biggest challenge for 21% of online event organisers is a lack of tech knowledge.
To help bring that number down, today we wanted to explain the basic elements of how to get a live stream going. Hopefully this post will help you get to grips with the steps it takes to create a live show online and to demystify what’s actually a pretty straightforward process once you get started.
The elements you need to get started with live-streaming are these:
- Hardware
- Somewhere to show your stream to your viewers
- A production tool that can encode video
- Potentially: Stream keys
- Optional: Skype or another video conferencing platform, if you’d like to involve remote guests.
Hardware
“Hardware” can feel like a foreign realm, if you don’t know where to start. We’ve written about producing home-made video in detail before if you want to dive into the subject, but all you really need to get started with live streaming at home is:
- A computer
Yep, you read that exhaustive list right.
While you can keep upgrading your microphone and camera, realistically you can start testing the live-streaming waters with just the machine you’re reading this on. (Unless you’re on the move, in which case 👋.)
You just need a camera and a microphone and a computer to put it all together with the steps that follow.
Somewhere to show your stream to your viewers
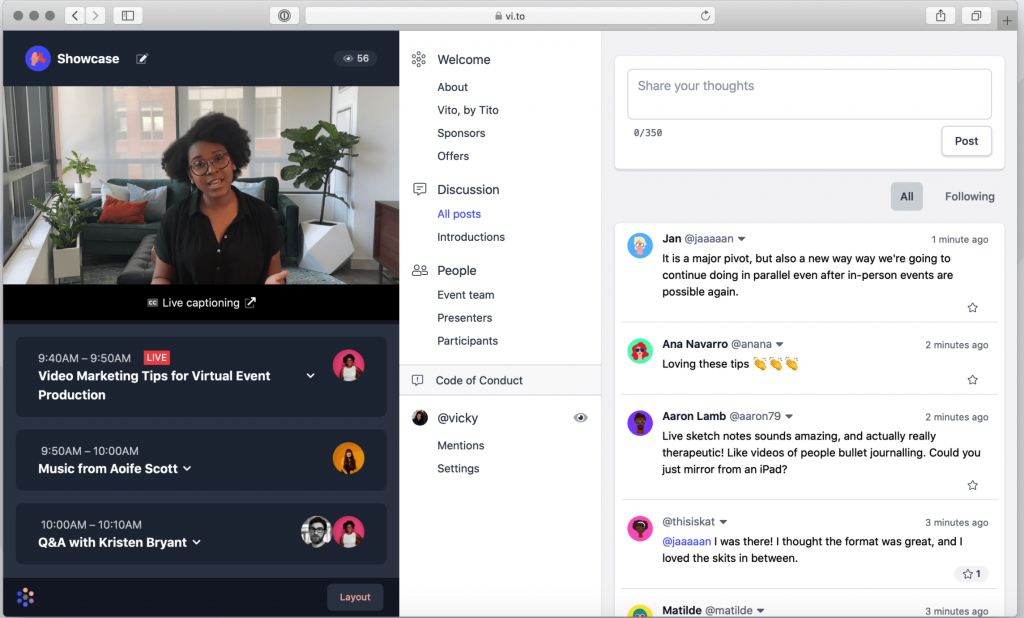
For the sake of this post, we’ll be using our own online event platform, Vito, as an example, but you can apply all of the principles here to a multitude of platforms.
In this section, we’re simply referring to the the final platform where your audience will watch your content.
A production tool that can encode video
If you’re new to streaming, please don’t be scared away if you don’t know what video encoding is. In simplest terms, a video encoder is something that translates the code of a video file into language that can be understood by a live-streaming service.
There’s plenty more detail we could go into about the ins and outs of how that works, but since this is an intro, we’ll leave you with these links to investigate in your own time:
- https://www.boxcast.com/blog/encoding-decoding-and-transcoding-how-your-live-stream-reaches-your-viewers
- https://www.cloudflare.com/learning/video/live-stream-encoding/
At Vito, we’ve used four options for this and are experimenting with some other options which we’ve previously written about. The two I have most experience with are Ecamm Live for Mac users and OBS Studio for Mac, Windows and Linux users.
Using either of these systems, you can produce live-streaming for online events, or pre-record video and the system will encode the video for you, ready to share on the platform you’re hosting your video on. The only other step you need is to connect this system with that hosting platform. And for that, you’ll need…
A stream key (depending on your streaming platform)
Some streaming platforms have build-in integrations with some video hosting platforms. However, for a system that isn’t natively set up to work with your hosting platform, you may need to generate something called a stream key.

A stream key is a string of characters that helps the hosting platform you’re using locate the correct file in your streaming platform. In Vito, we use a service called Mux to generate this. As a Vito user, an individual need simply click into the Livestream area of the system and they’ll find the key right there.
Step-by-Step
From there, you have everything you need to get started with live-streaming for online events and, broadly speaking these are the steps you need to take to get your live-stream up and running:
- Set up your recording equipment. (This is where the aforementioned computer comes in handy!)
- Generate any stream keys you need
- Add the stream key to your production software
- Record the stream in that software
- Et voila!
Optional: Skype (or another video conferencing platform), if you want to involve your speakers
This is where things get fancy.
If you’d like to host a live-stream with two or more participants in different locations, you’ll need to involve a system that allows you to video call them.
For the purposes of this example, we’ll look at Skype.
Within Skype, there are options pertaining to something called NDI®. NDI® is a proprietary protocol that allows video compatible devices to communicate with each other over a network. In layman’s terms, in the context of Skype, it’s a setting that allows two or more devices to share content to a live-stream.
Again, this is something that can get complicated, and which can vary based on the different software you’re using for the live-stream, but in the spirit of introduction, here are some useful resources for understanding how it works:
- https://support.skype.com/en/faq/fa34853/what-is-skype-for-content-creators
- https://www.newtek.com/blog/tips/using-ndi-in-skype/
If you’re interested in exploring Vito’s live-stream capabilities, you can check out our website for further details and to request information about the specific set up for our recommended live-streaming tools.
Otherwise, we hope you enjoy exploring and creating with live video, and wish you the best of luck!