You may be wondering… “what is a styled shoot?”
Well, here is everything you need to know about styled shoots!
Let’s start with the basics.
A styled shoot is a micro event setting.
This mock wedding or pretend event setting is created by a team of event vendors.
The vendors have the opportunity to flex their creative muscles by collaborating in an effort to provide their expertise and services. They provide this in exchange for images and mention of their own work.
It is an opportunity to get your name out there with little to no cost depending on your trade.
The Significance of This
So, why is a styled shoot important?
These shoots provide exposure for various types of vendors. That means you!
It’s a chance for potential clients to see what you can do for them.
It’s a way to invite them into your world of color swatches and mood boards.
Almost like a preview before you buy. I mean, who doesn’t love that!?
Plus you get to collaborate and form long lasting partnerships.
These shoots are submitted to media outlets.
Anyone who is planning a wedding will be on the lookout for ideas.
They will be on the prowl for something that will WOW them, as they research in wedding magazines, websites, and blogs.
Ah hem, Eventplanning.com.
For the bride looking to take on the tasks alone. That is, until she realizes how much is involved and how easy it is to delegate wishes into a reality.
Not to mention, other event planners and wedding vendors are reading these media sources regularly to find inspiration or new innovative ways to be effective as a planner.
You could find an opportunity to work with one of these vendors, if they see and like, your work. They could either ask to work with you or possibly ask to collaborate on their project.
It is important to tag all involved for their hard work and efforts.
Remember, give credit, where credit is due!
Sign Me Up! Where Do I Start?
You may be saying, “This sounds great, how do I start?”
The important elements of a styled shoot are the theme and vision behind the shoot.
The first thing that you must ask yourself is “What theme am I trying to achieve?” Let this question guide you through the creative process.
Every styled shoot needs a theme.
The theme doesn’t require simplicity or even consistency. Your theme could be a hodge-podge if that is your style. This will guide your decision-making as you move forward in the process. Embrace it!
The next element is the vision.
This is when it is time to get creative and think outside the box. But remember, be inspired but never copy!
Not sure how to get the creative ideas flowing?
Here are some things that you need to do in that case.
- List out all of the themes that you see and like, and write down what it is that you like about them. You have to remember that there are critics out there and you cannot make everyone happy. Be true to yourself. Be unique. Be real. If there is a theme that really speaks to you, you should go with the flow and carry it out. You never know who will absolutely adore your audacity!
- Get your body moving. Go for a walk or run. You will be surprised by what inspires you in nature or things you will notice that you have never noticed before! Listen to the expression, “stop and smell the roses.” Blood flow is actually proven to be a booster of creative thoughts. A source stated that “it showed that walking significantly improves certain types of cognitive efforts involved in creativity, specifically convergent thinking, such as the ability to come up with solutions to a problem, and divergent thinking, which involves conceiving open-ended, original ideas.”
- Let’s get your mind working now! Time to write it out. You can do this through journaling or a brain-dump. Journaling would work because your very own thoughts on daily life could inspire you in ways you never thought possible. Brain-dumping works when you stay focused and write everything you think of pertaining to the task of finding a theme.
There is usually at least one idea that will gravitate towards you! Take it and run with it!
Remember that you can never think “too big” when finding your creative ideas. Think colossal and work back to realistic.

Set the Mood
So, you have your idea. Now what?
It is time to make a mood board.
A mood board is a strategy to prepare for a project. Think about it as a vision board that you would make as a kid. Instead it is more focused on one particular event, instead of your whole life planned out on a 16×20 poster board.
Mood boards are used in many different ways, for numerous types of careers.
For example, interior designers, event planners, graphic designers, and photographers, to name a few, who all use versions of a mood board.
Mood boards consist of anything that inspires your theme. It is a board of inspiration. It could be anything from paint swatches to a piece of fabric.
I have seen a vintage brooch used which inspired the creative director for the whole theme. It inspired gold and emerald tones into a vintage styled theme which met a modern style for accent pieces around the room.
I have also seen a greeting card posted that contained beautiful colors that the creative director was determined to find or make if necessary.
Mood boards force you to visualize what works with the theme at hand. You may realize that a color or texture seems perfect in your mind but it is impossible to “make work” with your theme. Do not discard it, but let it inspire you for another event!
Just because it does not work well with one theme does not mean that it will not mesh well with other themes. You can try various types of fabrics or colors. Perhaps it is the fabric that is holding you back from moving forward. Play around with different ideas until you find a combination of articles that work.
You want a combination that makes you feel good about it. Something that leaves you totally and utterly in awe.
Remember that walk we took to boost creativity?
Let’s just say we found a pretty colored leaf that took on a beautiful brownish-green blend with a random dot of red. Take it with you and add it to your mood board.
That would be a phenomenal mood board piece that would symbolize the color theme you plan to use. Maybe red accents? Hmm…


Let’s Talk Props
What else? Props!
Props are a huge part of styled shoots.
Your props must compliment the other pieces in any given theme. You will always have your go to items that you find work with all shoots. They are versatile pieces that become essential. Versatile pieces can be transformed into different looks.
For example, a table can be painted, spray painted or stained to achieve the look that you need.
What if you do not have any go to items?
Check online to see what might work. We love searching Etsy and amazon to see what other creatives might build what we need!
You can check well-known franchise stores for lower cost items, boutiques and furniture restoration stores. These are always a good place to start for unique items of any range.
If you find a table online that you can see with your theme, print it out! Add it to the board!
Another option would be to find a chair at a garage sale that is low cost. If you are the Jack or Jill of all trades then reupholster it, utilizing your favorite fabric, you bought extra of, and have no clue what to do with!
That, my friends, is inspiration at its best!
Another option is using furniture rental companies as the way to go. Some companies will offer you lower costs or no cost for renting their items for a few hours. See the coordination section for more about this!
Strategy
We have our clear vision, made possible by our mood board of course.
Now that we are on a set track, let’s shift to the coordinating aspect of this project.
Coordinating is a significant part of the shoot. In fact, any shoot you decide to take on.
Why? Because it is crucial to gather the necessary information to produce a complete guide for not only yourself, but your vendors as well.
This can range from letting your vendors know when and where to be, allowing you to see the project as a whole, to making necessary adjustments as the project progresses.
These necessary adjustments include:
- Monetary or budget adjustments. The funds of a project becomes a vital importance; because you are recording all items that need to be purchased and any hidden expenses that might be involved.
- Vendor cancellations and emergencies.
- Backordered items or a set delivery that will not arrive in time for the event.
The communication becomes significantly important between all creatives and delivery facilities. When coordinating, have a list of phone numbers, contact names, and company that they work for. This will also help you with future projects and events.
You will find that most planners keep track of the experience they had with vendors or delivery facilities they have worked with.
After strategizing, it is important to make lists.
See below for a compiled list of lists that you should have!
1. List of vendors being used on the day of the shoot
This list should include contact information such as name, phone number, email, website, and any description that will help you find them easier in the future.
A few vendors you might want to track include:
-
-
- Photographer
- Videographer
- Wedding cake designer
- Tablescape professional
- Stationary professional
- Dress maker
- Any unique maker of decorative items (ie. candle maker or table maker) Sometimes they will come with their product to ensure safe set up and return
- Bride/groom models
- Coordinator/assistant
-
You may not have a full-time assistant due to lack of funds, delegation experience or just not knowing they exist! There are companies out there, like Lavish Lifestyle Management, that are willing to virtually assist with coordination or day of set up if they’re local to you.
In other words, these are the event operations you must think about.
2. List for ETA of Delivery Items
The purpose of this list is for an item being sent to make sure that it shows up on time.
- This list you will need to keep track of: tracking numbers, estimated delivery dates, and items that never showed up. Yes, it happens. Let’s be on our A-game to avoid this at all cost!
- If you want to be thorough, I suggest including a column for an alternative item. This is just in case, your delivery cannot be delivered or there is an issue in transit of your original item.
Do the leg work up front so you aren’t scrambling to find a new item on the day of!
Reminder: Make sure the plan B item is available for the day you need or accessible in a local sore to avoid delivery issues again.
3. The Project Timeline
The importance of the timeline is for you, as the planner, to stay on track with coordinating.
Your timeline should have dates you expect:
- Creative vendors confirming their availability
- When you will have ALL of the props “in house” or delivered to you.
- When the items are due to be back to their owners (if renting or borrowing)
One item may be due back immediately after use, while another item may be requested to be shipped out within 7 days.
3. Confirming AND reconfirming the venue or shoot location, sort this task by the dates you plan to execute following up with the venue or shoot location.
If there are multiple shoot locations for one particular styled shoot, have these noted on your timeline. The more detail you put into your timeline, the more it will help you understand the scope of the project.
4. The Day of Itinerary
Just like the actual events, your styled shoot should have an itinerary that shows what should be happening within each hour of the shoot.
- Think set up time
- Think venue allowance time
- Venues may have an allotted time for a planner to use their facility. Make sure the timeline has this in mind when creating it. Very Important.
- Think availability of vendors
- Availability of vendors is something to remember during scheduling, because creatives often book more than one job on a specific day.
Example: If your hairstylist says she needs to leave by 4 PM, make sure her responsibilities are scheduled tightly, to be done well before that time.
I’d even say well before that time because you always need to account for possible emergencies.
Emergencies such as redoing a hairstyle that fell out in the middle of a set. Although the example is unlikely, it is always a possibility!
We as event planners, schedule possibilities with “the worst case” in mind.
- Think priority of responsibilities
- Priority Responsibilities in reference to make-up artists, stylists, floral designers, and hair stylists (to name a few). These creatives will most likely be more on the front end of the timeline as their craft is required to get the shoot up and running.
It’s good practice to have everything on rotation.
If a hairstylist is working on a model, you may want to have the make-up artist working on the other model.
The goal is to have everyone working at all points of the day in harmony. This is what makes a successful styled shoot.
- Think breakdown. All hands on deck!
Your styled shoot IS your event, treat it as such.

Location, location, location…
It is important that you check to see if the venue or location is available.
You also need to check whether or not you need permits to shoot at that location.
Permits might be required depending on the location. Outdoor spaces like parks or even historical locations usually require one, but it is still advisable to check with the local town authorities.
You can acquire a residency in a photographers studio. This applies if you allow them to be your exclusive photographer for projects within their studio. That is only fair.
You might even be able to find a shared workspace or studio that is dedicated to creatives.
In New Jersey, there is a large factory that was revamped and all of the rooms hold special features that creatives find to be useful. All different backdrops are under one roof. The space is called the Art Factory.
We have been fortunate enough to hold numerous shoots in this building. It never disappoints. See if your area has a similar setup.
When it comes to the location, you need to think about local spaces and what you can do to transform them into your creative area for the shoot.
Some local boutiques, restaurants, and coffee shops with character have amazing views or backdrops. If you find the right area or clear out a section of the space, you can easily make it a memorable mock wedding photo shoot.
Transforming spaces that you would never expect, is a unique experience knowing there will be no other shoots like it!
Think outside of the box!
It is important to keep in mind that the business would most likely have to halt their business or limit their customers to one area during shooting time. Due to this fact, it also might limit your time at the location.
You might be approved for one hour for a shoot you know would probably take three or four hours.
This will impact your timelines and how you create it!
For example, makeup and hair may need to be done at a different location prior to arriving for set up.
Remember that not all businesses are open to this idea of having their business cease operations for your project.
Be respectful of their wishes and keep moving forward if they decline. For every “no,” there is a “yes” out there!
Consider multiple venues with similar aspects that can look like the same backdrop or at least the same mock wedding location.
It will help your pictures have a range but still stick to the theme.
Rent-a-WEDDING?!
An alternative route would be to email for day rentals.
As I mentioned before, you do not need to purchase all of your items.
Renting is a great option.
It is great because you are given the opportunity to see if a product works for you. If you find yourself renting it often then maybe it is time to purchase the item!
If there is an item you do not have, or you are having trouble finding the amount of items you need, like glassware, try to find a rental company. These companies are usually cost effective, and you can rent the item with ease and send it back.
Some smaller companies are open to lending items to you with a specific contract confirming that you have the item and will return it in a certain amount of time. This could be until the end of your event, the end of the day, week, or even month. It is up to the rental companies’ discretion.
You should send an email explaining that you are working a styled shoot project that will be submitted for marketing all businesses involved.
Let them know where the shoot is going to be located.
Sometimes where the item is going will factor if they want to rent it to you or not.
Let them know what type of item you need, explain the purpose of the item and how it will be used in the shoot. Always ask for availability specifically on the day you need said item.
Tell them how long you expect to hold the item, ask if they would be willing to lend the item to you for a certain amount of time, reassure them that you will take care of the item, and tell them that you are looking to work with them on a collaborative project.
If they could lend the item to you, you will promote their company and help them gain exposure through your advertising. Not all companies will do this but it is worth a try.
There are bound to be one or two that are open to the idea.
Make sure, without a doubt, you follow the company’s instructions, without fail. If they ask you to return an item within an hour, make sure that the item is returned in one hour at all cost. Otherwise, you run the risk of them not working with you again.
Building relationships and partnerships in this business is a key to success.
Vendor, oh vendor, where art thou vendor?
Using local vendors is highly beneficial.
You build a network of like-minded creatives, possible clients through referrals, knowledge of an aspect of which you may not be so familiar with and you can help other small businesses.
As I mentioned, keeping track of your experience with past vendors is always a good idea.
This will help you with many events from now into the future.
When you are looking for a quality creative to help you on event day, you have multiple vendors to choose from that you can confirm are top quality.
Hypothetically speaking of course, let’s say, an emergency strikes with your current photographer or dress designer. You find yourself in a bit of pickle, don’t you?
Not if you planned for the possibility of a forced cancellation.
Whatever the reason may be, you have another in your back pocket. Another individual that is aware they are on call and ready to go at a drop of a dime.
Well, the shoot must go on!
You must be resourceful. Always think about your network.
Perhaps you remember working with this amazing photographer or dress designer. You know that their quality and work ethic from the shoots. You know they will hold up to your standard and produce quality results.
On the flipside, it is important to never be afraid to reach out to new vendors.
Find new “gems” in the market. There are constantly new creatives popping up.
There are even some creatives that are not officially a business yet, and work as a hobby or practiced skill. Their product or service could make your event! Why not try new things?
Remain open minded. Exercise your creativity by exploring all options. Switch. Things. Up.
Day of Delight
It is the day of the styled shoot!
The moment we have been waiting for.
Here are the things that you should know about the day of the styled shoot.
This is the day that survival kits will become your best friend.
You cannot predict what other people may or may not do. If you ask a model to bring a white button down shirt, make sure that you have an extra just in case. If they forget it, you know you have one on standby.
Some things to include in your survival kit are:
- Steamers
- Scissors
- Regular tape
- Double sided tape
- Bobby pins
- Safety pins
- Hot glue gun (Don’t forget the glue!)
- Stain remover pen
You name it and you will probably need it at one point or another.
As far as the initial set up, make sure to have a plan for the set up. If you are following this article thoroughly, then you have this in place. Good job!
This plan should consist of a start time and an end time listed on your timeline.
Delegate to everyone’s strengths and weaknesses (if you know them well enough). If not, I assure you, you will find out fast, so pay attention.
All hands should be on deck during the set up.
Always assume that set up will take an hour at minimum. This includes loading or unloading the cars and trucks and everyone working on setting up their craft.
Make sure that you stop helping once in a while to do a walk through to make sure that no one has questions.
An initial meeting upon arrival will help to alleviate this.
Walking through will also make sure everything is being put up correctly. You are better off making the adjustment at the beginning than to have someone take time to redo it, or worse, struggle to break it down later.
The more help you have to break down after a shoot, the faster for everyone to go home.
As a nice bonus, you could slice up the mock wedding cake for all who helped and it would be a great treat after a long day of shooting! So, maybe add paper plates and forks to your list of essentials if you plan to do this!
The last thing you need to know for the day of the styled shoot is the payment if applicable. Make sure everyone is aware in advance, how much they are getting paid, when they are getting paid, and IF they are getting paid.
Like I said, most of the time, you can coordinate these shoots with no charge. Just creative collaboration under one roof for experience and exposure.
And that is a styled shoot! Easy peasy.
Upon completion of a styled shoot, it is a nice personal touch to always follow up with all vendors involved.
Personally, I like to confirm they had a great experience.
See if they have feedback about how their experience was with you.
You may find some things to work on, or get suggestions as to how it can run more smoothly.
Maybe you were perfect! It’s always nice to hear that as well.
If you enjoyed working with them, or find their talent to exceed expectations, I would recommend asking if they would be interested in doing another shoot or event with you.
Exchange contact information. Voilà!
Make sure you have everyone’s social media handles for Instagram, Facebook, Pinterest, and Twitter.
When you share photos, everyone should be listed as what they do and a clickable link displaying their handle name, for someone to see their profile easily.
This is gaining exposure not just from your followers, but their followers will be clicking on your link as well! It is a great way to cross promote and this is effortless marketing.
After receiving the final product from the photographer, make sure to submit them to the media outlets of your choice.
Check the websites to find out how to go about doing so. If your styled shoot gets the recognition that it deserves, you might be presented with offers to work with creatives that felt inspired by your work. They might even pay you to be part of their creative team for a styled shoot!
Exciting, am I right?!
Feel free to leave in the comments below, or links to some of your latest styled shoots!
You can also submit your styled shoots in our private Facebook group or the contact page on this site to be featured.
Next we high recommend you read how to get clients for your event planning business.
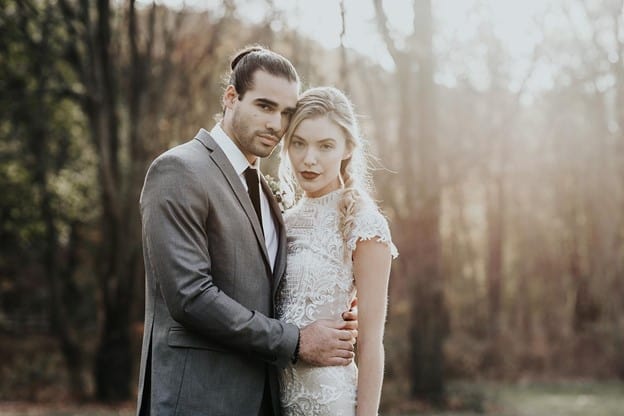
New Jersey Based Photographer Credits:
Image# 1-2: The Fox and Hare Photography.
Image# 3-6: Jessica Oh Photography.
If articles like this are helpful to your event planning, you will enjoy our “Become an Event Planner” course. For a limited time you can try the full course for only $1. This limited time offer includes proposal samples, 23 free bonus templates, and contracts; as well as 11 modules and weekly projects to help grow your business.
![]()
Click here to take advantage of the limited-time deal for only $1.

Great Read! This helps so much with what I’m doing!
Awesome to hear Brenda! Best of luck with your styled shoot!
Great information. Thank you
Very helpful steps. Thanks! I need to do this.
I want to start my own business this year. I’ve been planning events for 5 years for a company but I’m going to begin with a styled shoot. This is so helpful!
Perfect way to start Lauren!
Hi I’m a Chef how can this program help me
This can definitely apply to a chef but the key will be to make your food look amazing in the photos. Really think about how you want to display what your dining experience looks like, what mood you want your guests to feel, and then capture it in photos. This can be a big selling point for chefs.
Perfect breakdown of what to expect and the how-to’s of getting this done.
Great read very helpful ideas that i will used in future.
just perfect!!!!! PLANNED ON HAVING A STYLED SHOOT AND THIS ARTICLE HAS BEN SOO HELPFUL. NOW I WILL HAVE A PERFECT STYLED SHOOT.
Awesome ideas!
Such a great read! So helpful indeed. I’ve been working and saving up to eventually start my business n this is where I’ll start. So so grateful.